Integration with Confluent Cloud
Confluent Cloud offers a managed Kafka instance, together with advanced features such as connectors to various database systems and a schema registry for message validation.
Waterstream cluster creation process is same as for generic Kafka, but you may use the “Confluent Cloud configuration” dialog to simplify the configuration. Let’s go through the Waterstream cluster creation process.
Pre-requisites:
Confluent Cloud account
Waterstream Cloud account
Waterstream creation steps:
Create Confluent Cloud API keys - see Confluent documentation
(optional - if you want message validation) Create Schema Registry API key, get the schema registry URL - see Quick Start for Schema Management . Waterstream supports Avro schemes. The schema doesn’t need to be associated with the Kafka topic in order to be used in the Waterstream, you just need its subject name.
Log into the Waterstream Cloud, click “Clusters” to go to the clusters list
Click “New cluster” to open the cluster creation screen
Specify the core settings: Waterstream cluster name, region, version (latest is recommended), size, specify if you need WebSockets in addition to TCP and whether connection should be protected by TLS/SSL or should it be plain-text
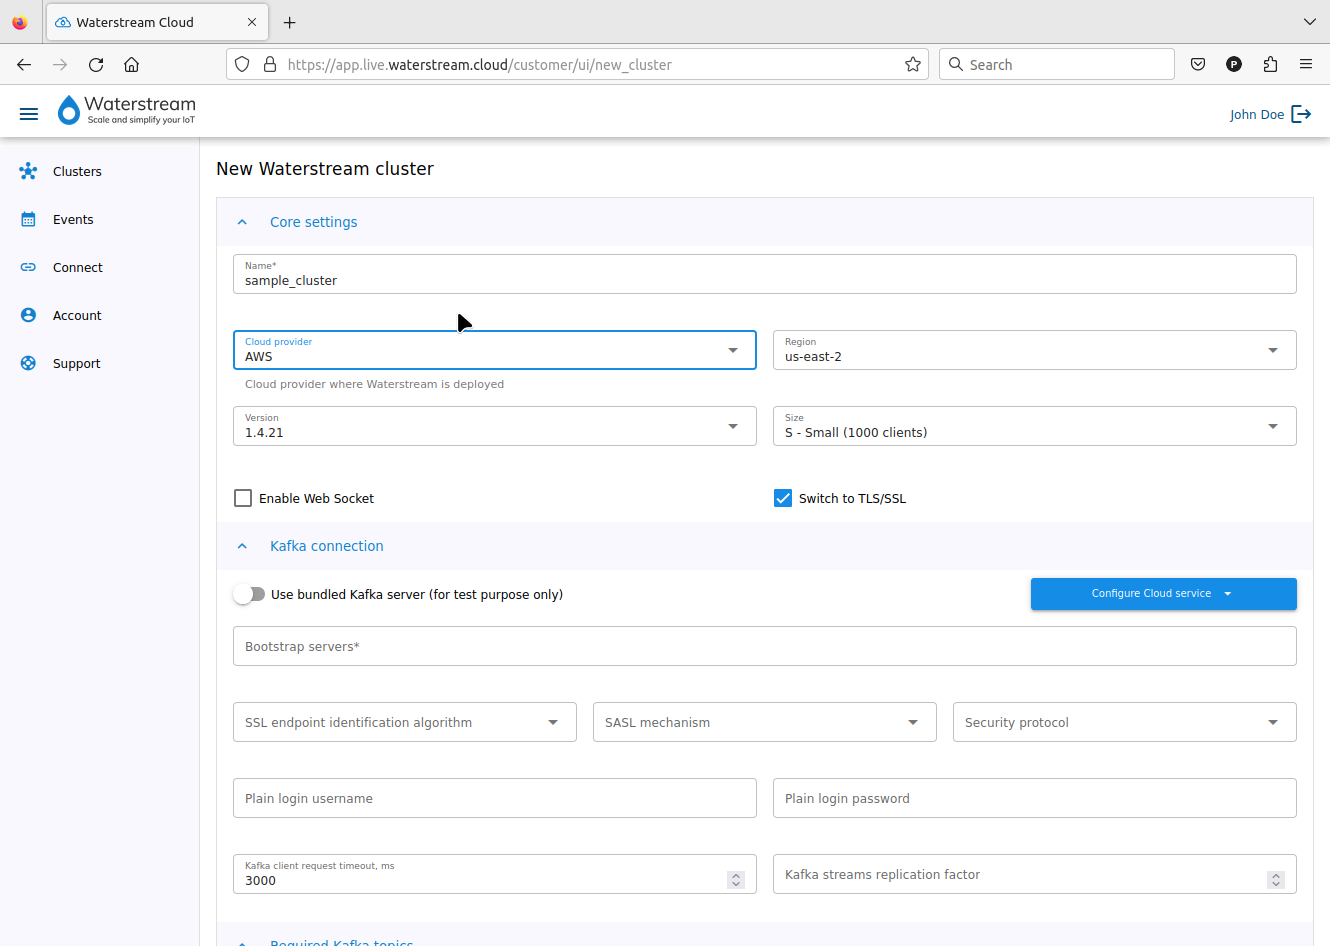
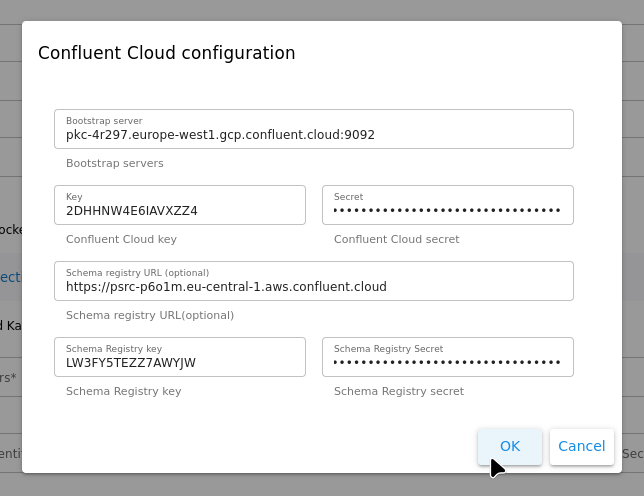
In the “Kafka connection” section click “Configure cloud service” dropdown, then “Confluent Cloud” button to open the “Confluent Cloud configuration” dialog. Enter the bootstrap server, access key and secret. If you want to use message body validation - also enter the schema registry URL, schema registry key and schema registry secret. Click “OK” - the values provided in the dialog will be set into the corresponding fields of the cluster creation form, and where necessary fields will updated with the values compatible with the Confluent Cloud (such as replication factor of the topics set to 3).
(optional) Set up message validation. If you’ve provided Schema Registry credentials in the “Confluent Cloud configuration” dialog or in the “Message validation” section you may associate MQTT topics with the subject names from the schema registry and have JSON message body validated whenever Waterstream gets a message from MQTT client or from the Kafka topic. Click “New schema configuration” in the “Message validation” section
(highly recommended) In the “MQTT Authentication” section specify how clients can authenticate and if the authentication is mandatory (i.e. if anonymous connections are forbidden). For production environment JWT is recommended, for testing you may use plain-text authentication with the username/password.

Specify the remaining settings if needed - see generic new cluster setup to know more about those settings
If you want to start it now leave the “Start the cluster immediately” flag on, if you just want to save the configuration for later - uncheck it.
Click “Create”, you’ll see the cluster details where you can see the status of the cluster. When it changes to “STARTED” your Waterstream cluster is ready to be used. “MQTT endpoint” contains host and port for the MQTT connection over TCP, and “MQTT WebSocket endpoint” - over WebSocket (if “Web socket enabled” was checked during cluster creation).
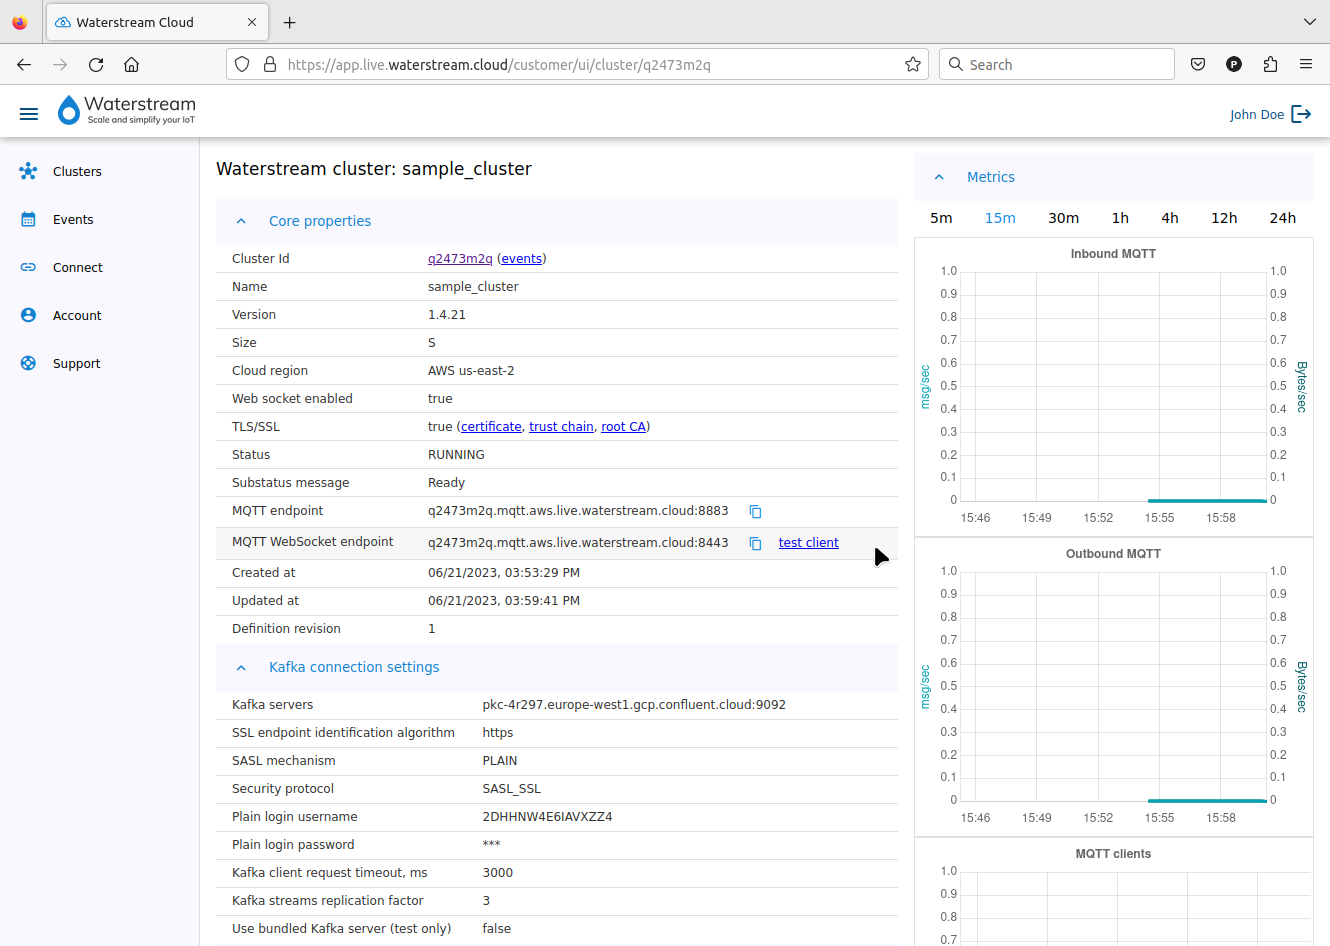
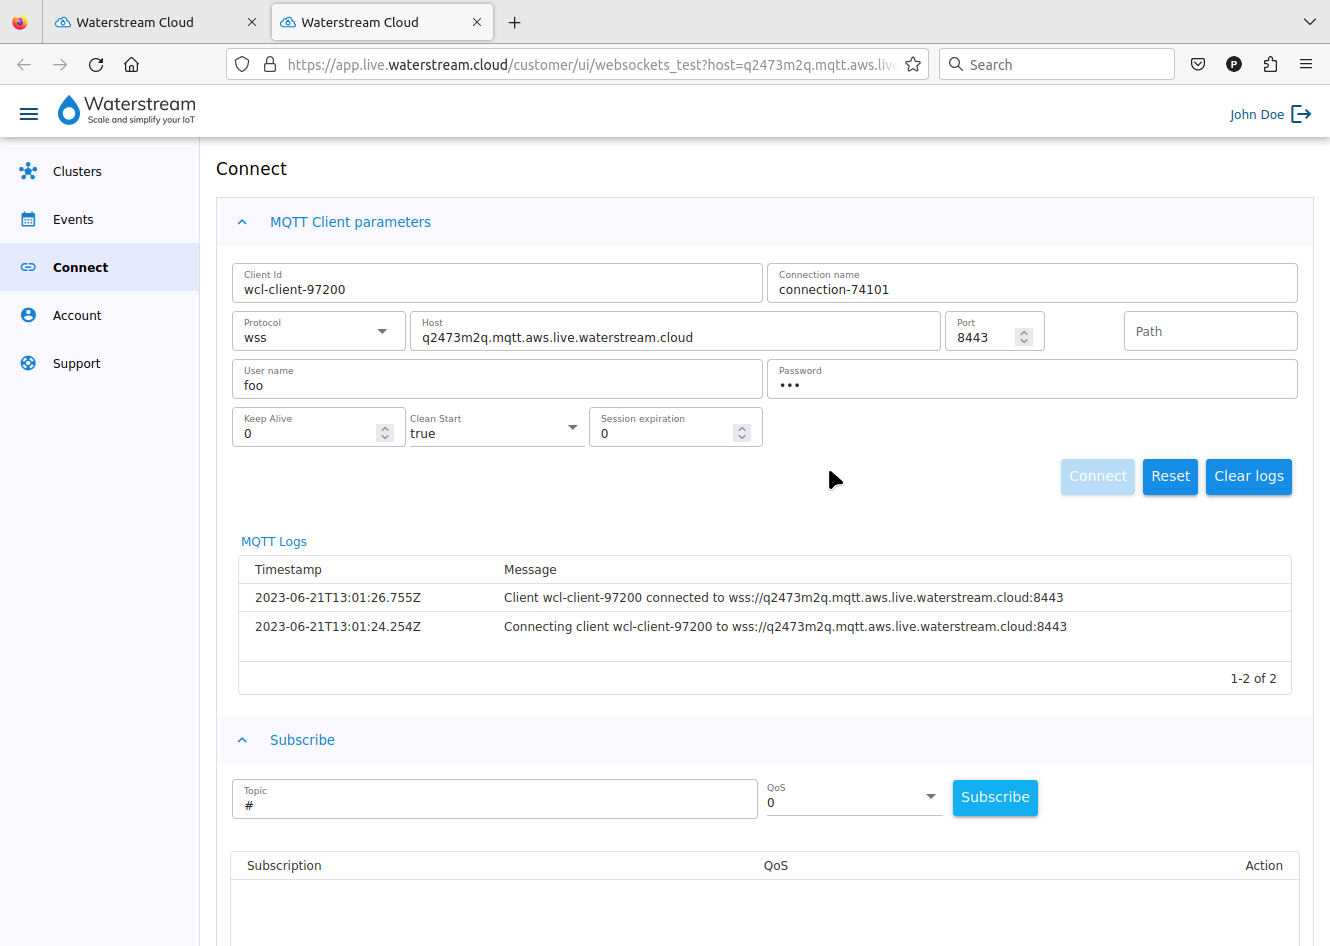
(optional) If you’ve enabled Web Sockets and TLS/SSL, then by the “MQTT WebSocket endpoint” you’ll see the “test client” link. Click it to open a test MQTT client configured with this clusters’ connection settings (doesn’t include authentication settings automatically). After providing the authentication credentials, you may connect to it, subscribe to some topic and publish a message.
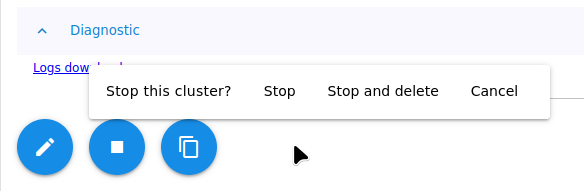
When you don’t need the Waterstream cluster you can stop it in the cluster details page (click “Clusters” in the left panel, then click the cluster card): click the “Stop” button, you’ll see the confirmation dialog where you can choose just stop (and keep the cluster configuration for later), stop and delete or cancel. Wait a new minutes until cluster state is “STOPPED”.