Managing a Waterstream Cluster
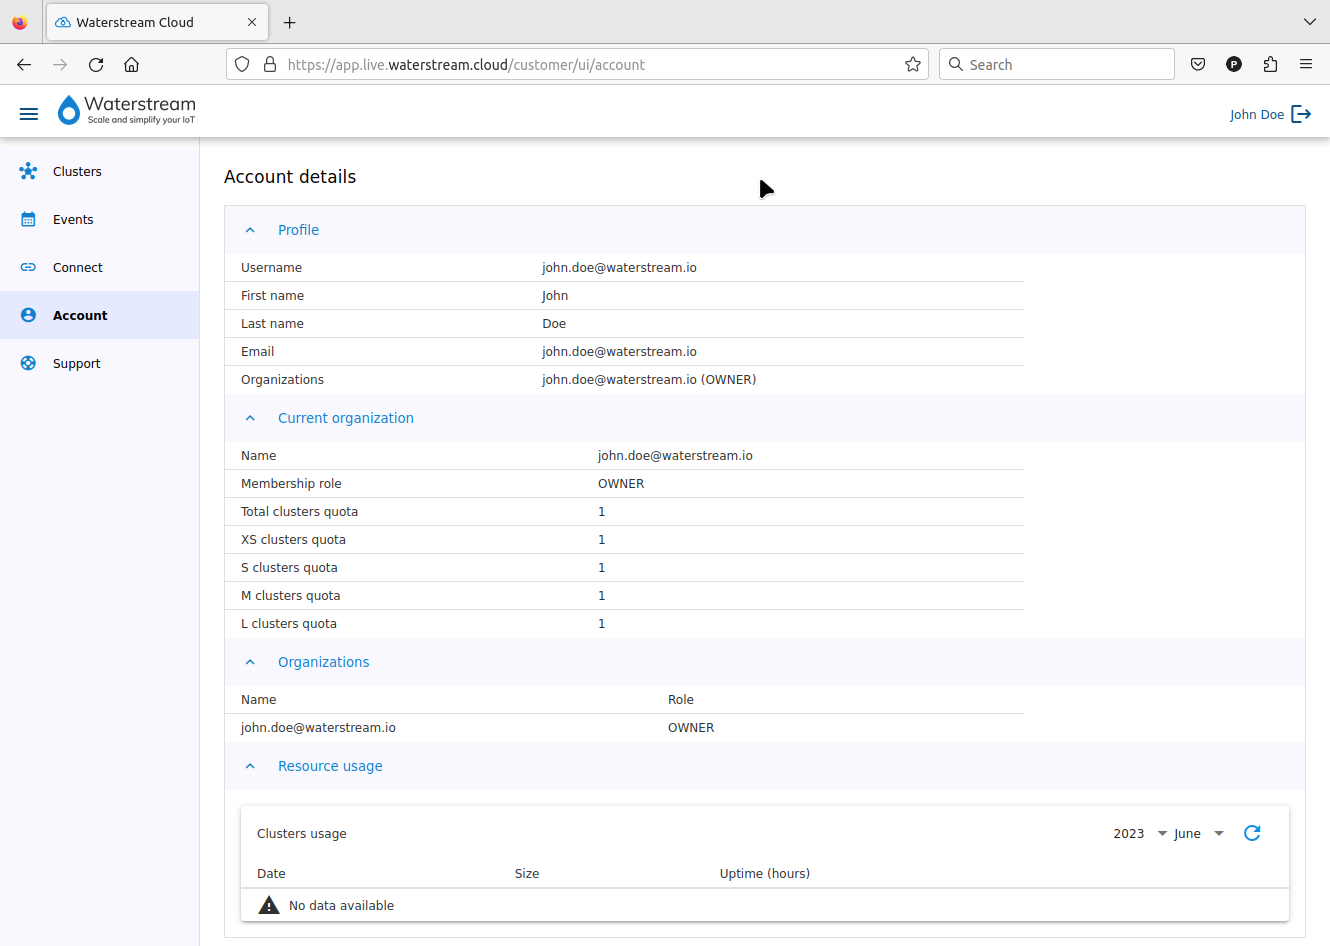
In order to create the cluster you need to have sufficient clusters quota in your organization. To check it click “Account” in the left panel and see the “Current organization” section. It shows the total clusters quota per organization and quota per each size of the cluster. By default you have quota for one cluster. Contact info@waterstream.io to extend your quota.
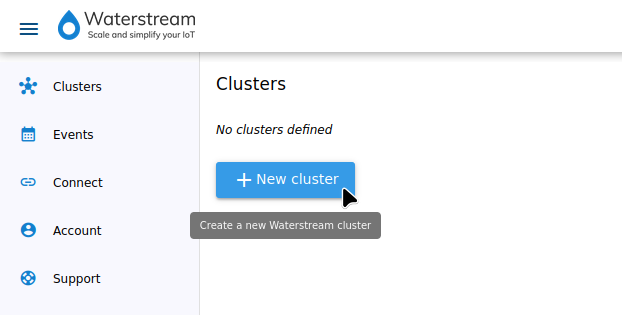
Click “Clusters” in the left panel to go to the Waterstream clusters list. Then click “New cluster” - you’ll see the form for creating a new cluster. The only mandatory parameters are “Name” in the “Core settings” section and “Bootstrap servers” in the “Kafka connection” section (if “Use bundled Kafka server” isn’t checked).
Core settings
Specify cluster name, pick the cloud region (currently, only AWS us-east-2 is available), choose Waterstream version (latest available is suggested) and size. If you want WebSocket connection besides the TCP check the “Enable Web Socket” in the “Core Settings” section. If you want TLS/SSL protected connection make sure to have “Switch to TLS/SSL” box checked. If you want plain text connections (not recommended for production, but may be convenient for early prototyping) - uncheck this box.
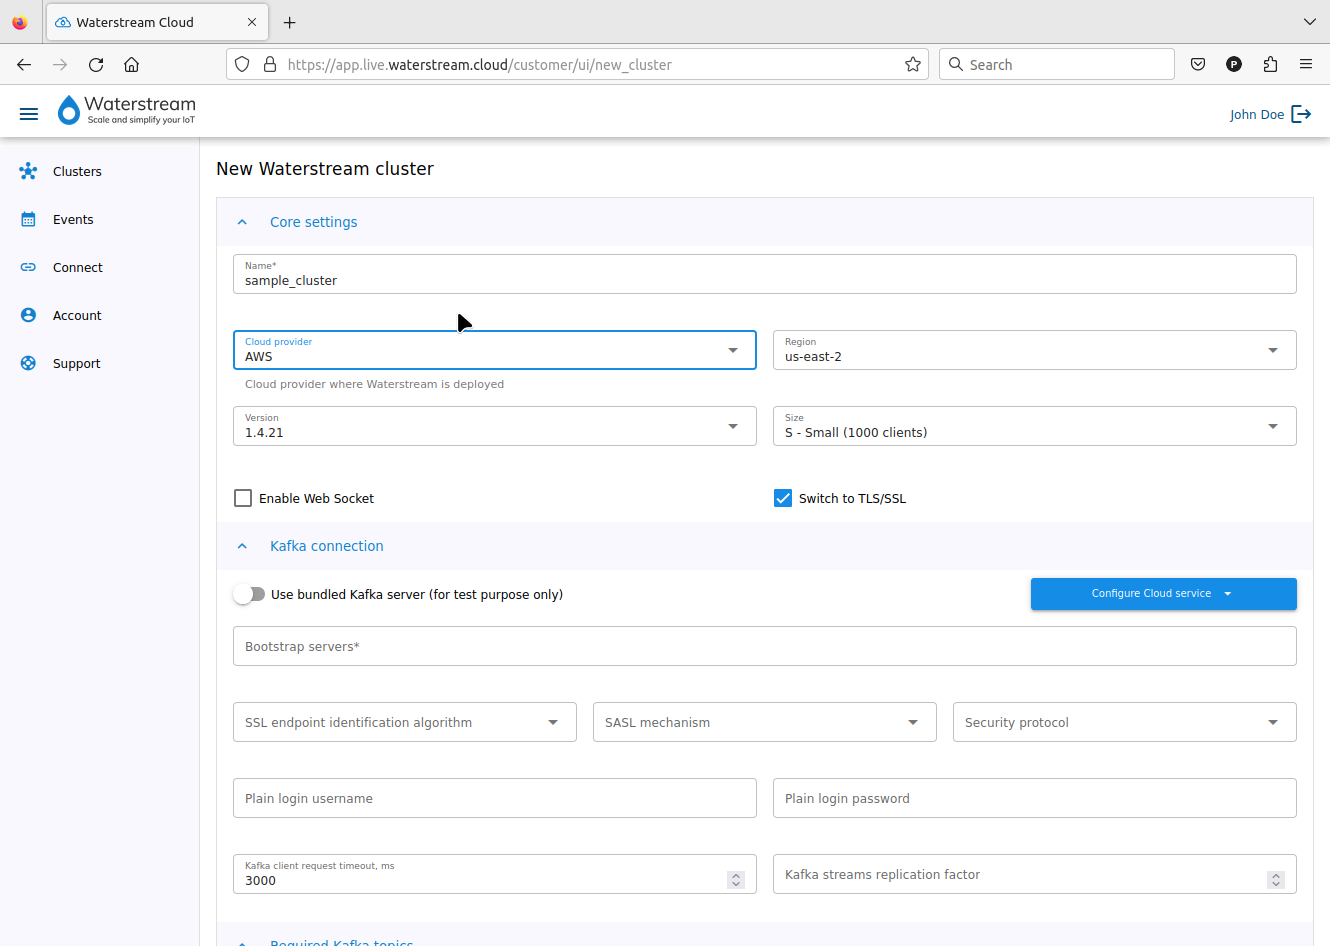
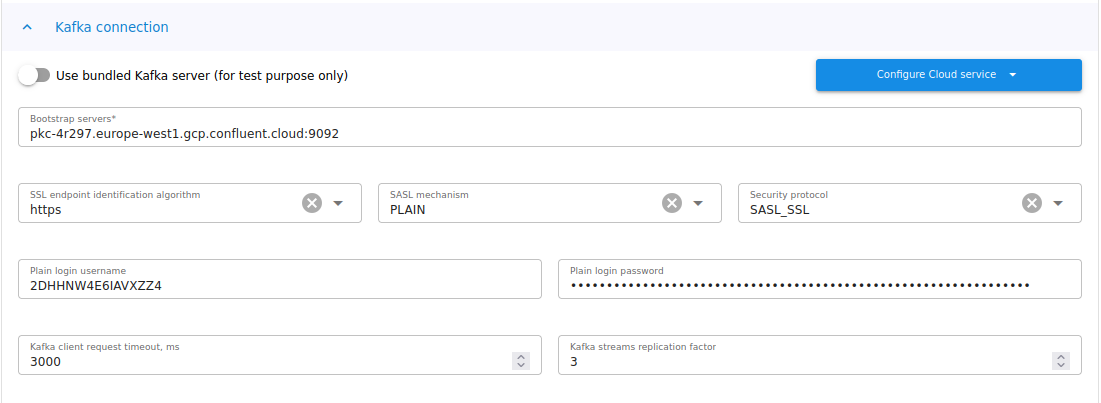
Kafka connection
In the “Kafka connection” settings you need to specify Kafka bootstrap servers and typically you’ll want to specify the authentication credentials. If you just want to quickly try out Waterstream as an MQTT broker and you don’t have a Kafka cluster you can enable “Use bundled Kafka server” option - in such case a tiny Kafka instance will be started alongside the Waterstream cluster, but you won’t have an access to this Kafka instance.
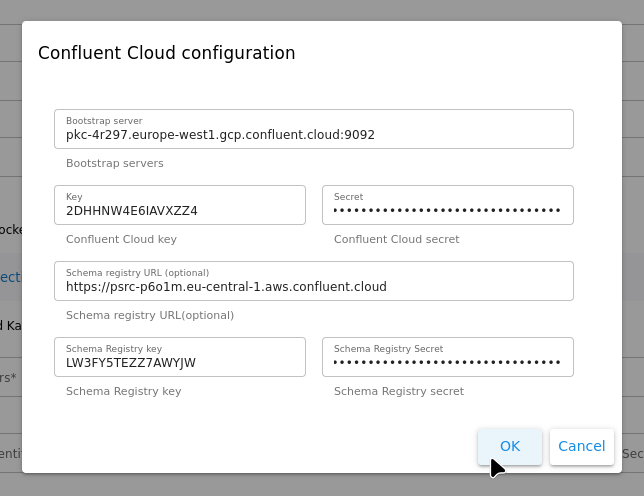
If you’re using Confluent Cloud the easiest way to configure Kafka connection is the “Confluent Cloud configuration” dialog: click “Configure cloud service” dropdown in the “Kafka connection” section, then “Confluent Cloud” button. In the dialog that appears enter the bootstrap server, access key and secret. If you want to use message body validation - also enter the schema registry URL, schema registry key and schema registry secret. Click “OK” - the values provided in the dialog will be set into the corresponding fields of the cluster creation form, and where necessary fields will updated with the values compatible with the Confluent Cloud (such as replication factor of the topics set to 3).
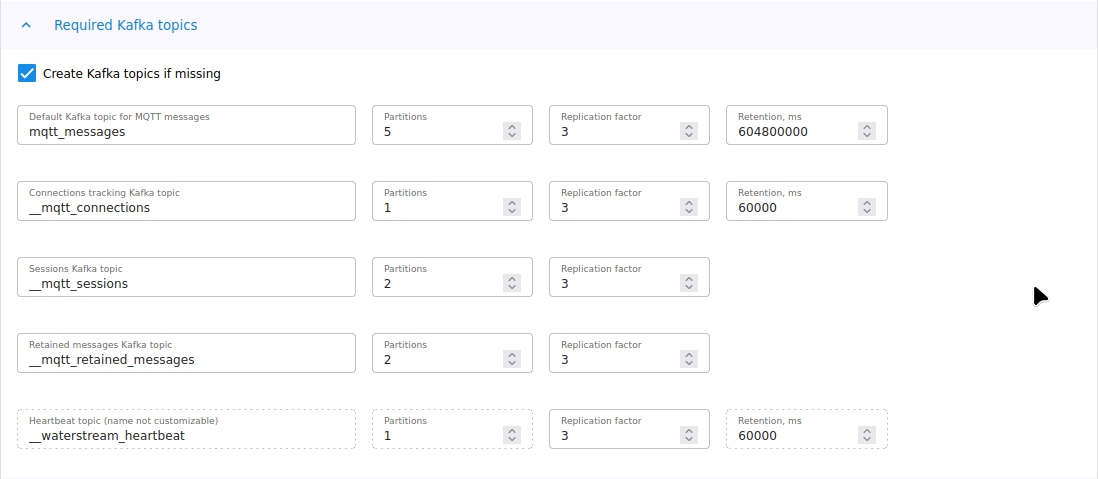
Mandatory Kafka topics
Leave the “Create Kafka topics if missing” flag on if you would like Waterstream Cloud to create the minimal topics for you, uncheck it if you prefer to create it manually (e.g. if Kafka credentials you give to the Waterstream Cloud don’t grant topic creation permissions). You may customize the topic name and other parameters, such as replication factor and partitions count.
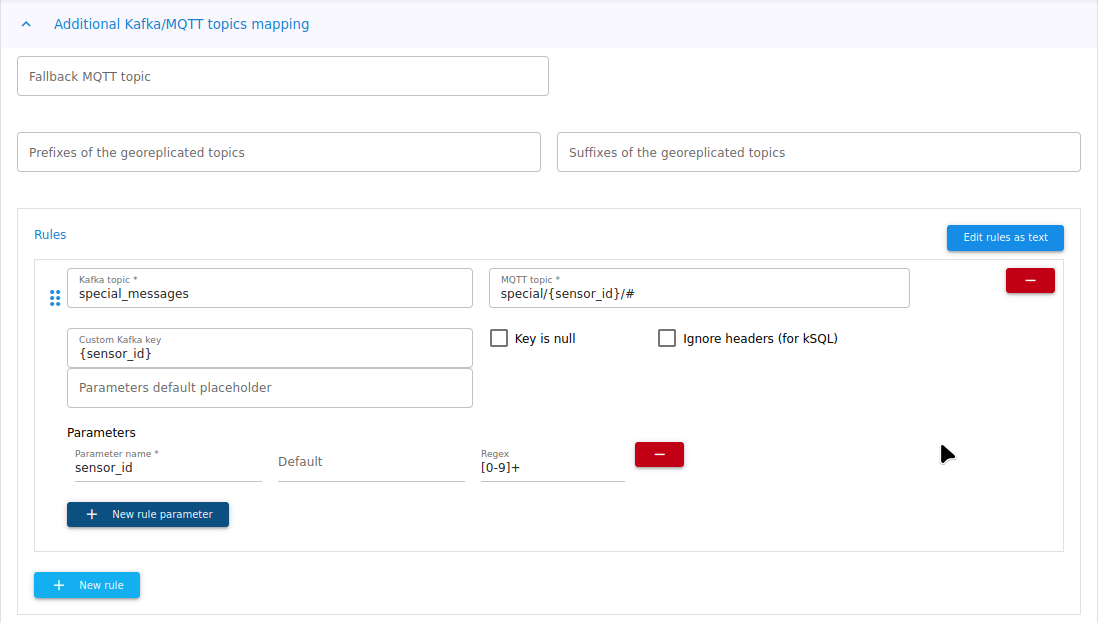
Additional Kafka topics
You may have more then one Kafka topic with the MQTT messages. In the “Additional Kafka/MQTT topics mapping” section
click “New rule” to define the mapping between Kafka and MQTT. You may use parameters in Kafka topic, Kafka key and MQTT topic - put its name
in braces, like this: {parameter_name}. In the MQTT topic you may additionally use the wildcards + (single level) or # (multi-level).
Click “New rule parameter” if you want to provide the regex for the parameter value.
See Waterstream MQTT to Kafka mapping documentation for the details of the mapping logic.
Authentication
First thing you can specify in the “MQTT Authentication” section - is the authentication required, i.e. if the anonymous access forbidden. Then you can configure authentication methods - plain text authentication and/or JWT tokens. Plain text is suitable for testing and development. For production environments use JWT tokens.

Authorization
Having configured authentication you can set up authorization - to which MQTT topics clients may publish and/or subscribe.
If no authorization rules defined then any client can publish/subscribe to any MQTT topic.
If some rules are defined but none of them applies to the current client, then the access if forbidden.
In the “MQTT Authorization” section click “New authorization rule”. Then you’ll be able to specify the
MQTT topic (possibly with placeholders such as {username} or {group}), action (all, publish, subscribe),
condition (to which users the rule applies) and outcome - does this rule allows or denies access.
The first matching rule applies.
See Waterstream authorization documentation to find out which placeholders are available, how to define the condition and other details about the authorization.

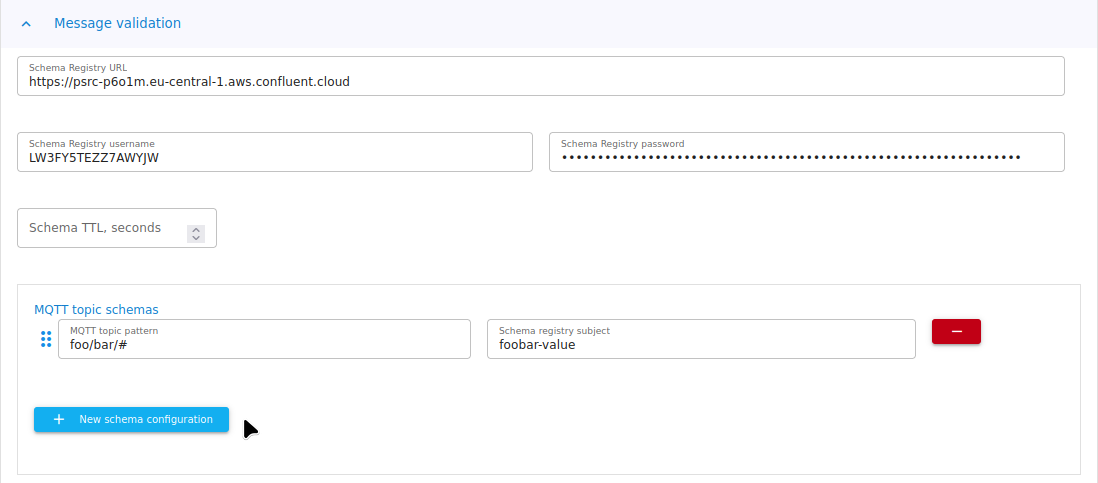
Message validation
If your MQTT messages contain JSON you may use Avro schemas fetched from the Confluent Schema Registry
to validate them. In the “Message validation” section you may specify schema registry URL and credentials.
The click “New schema configuration” to associate MQTT topic pattern (wildcards + and # are supported)
with the subject name from the Schema Registry.
Additional parameters
In the “Addtional parameters” section you may specify raw values for some environment variables which don’t have a separate inputs in other sections - see Waterstream configuration for explanation of meaning of such variables.
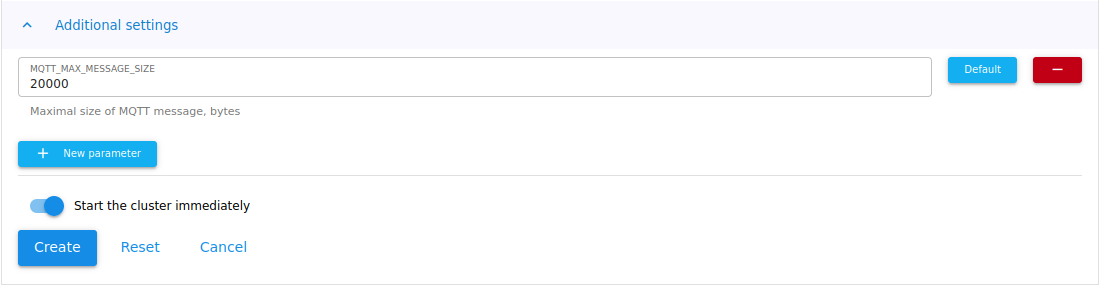
Starting and testing
Click “Create”, you’ll see the cluster details where you can see the status of the cluster. When it changes to “STARTED” your Waterstream cluster is ready to be used. “MQTT endpoint” contains host and port for the MQTT connection over TCP, and “MQTT WebSocket endpoint” - over WebSocket (if “Web socket enabled” was checked during cluster creation).
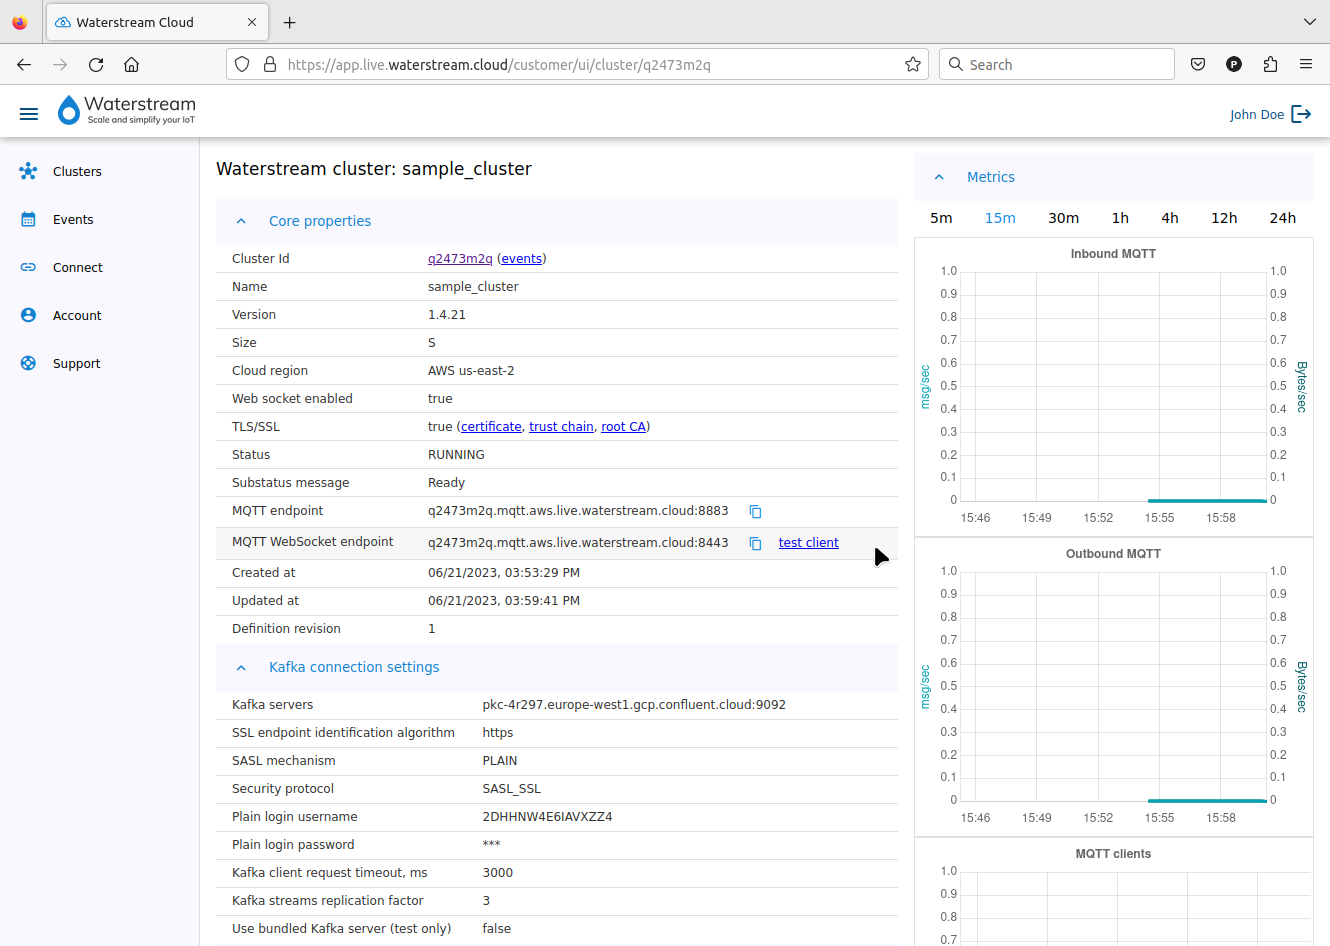
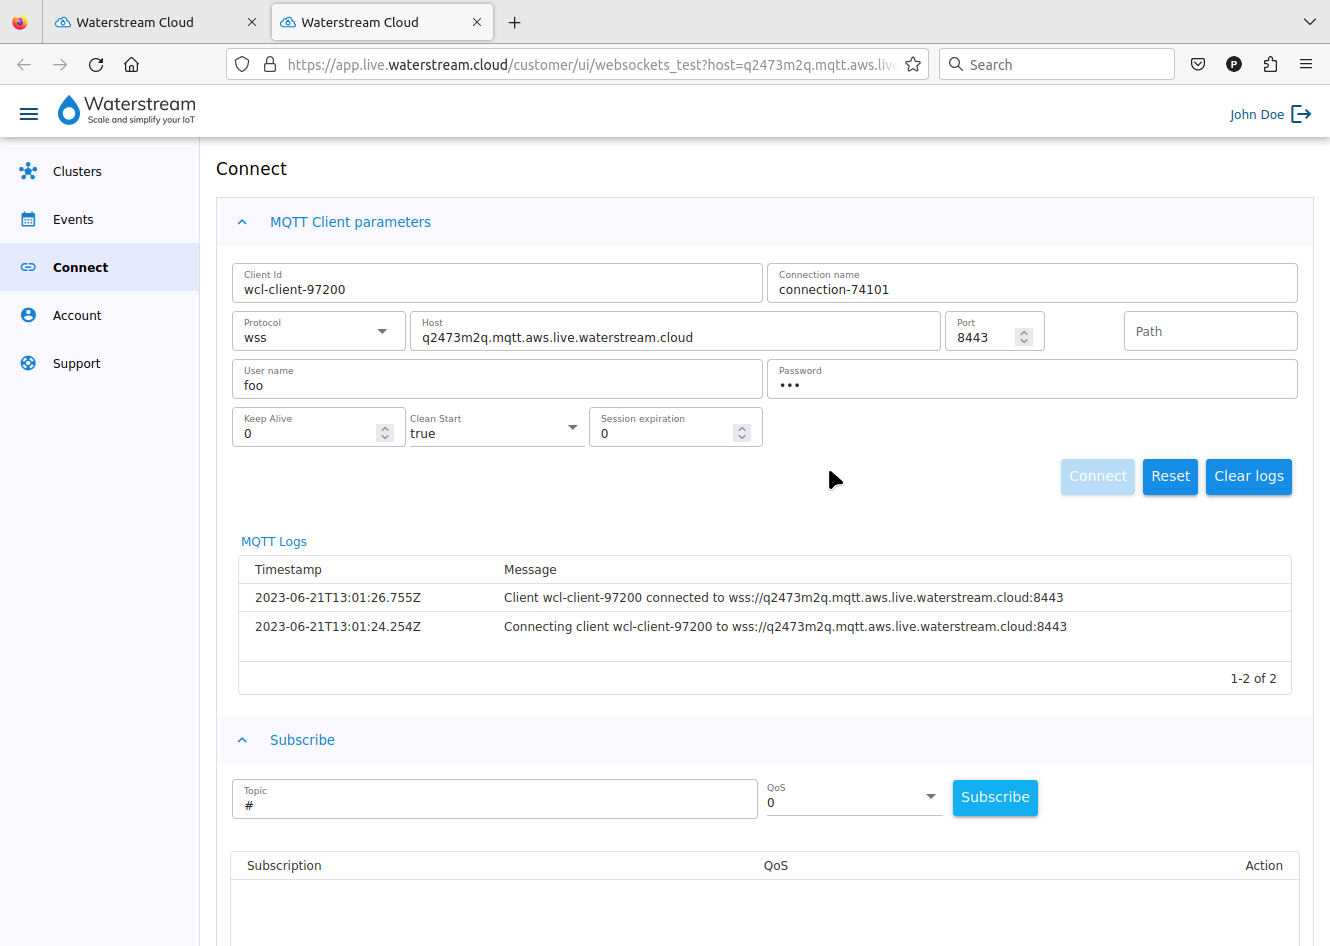
If you’ve enabled Web Sockets and TLS/SSL, then by the “MQTT WebSocket endpoint” you’ll see the “test client” link. Click it to open a test MQTT client configured with this clusters’ connection settings (doesn’t include authentication settings automatically). After providing the authentication credentials, you may connect to it, subscribe to some topic and publish a message.
Alternatively, you can use Mosquitto CLI client to test the MQTT connections over the TCP.
Subscribe to all topics:
mosquitto_sub -h <host> -p <port> -t #
Publish to the foo topic:
mosquitto_pub -h <host> -p <port> -t "foo" -m "Hello, MQTT!"
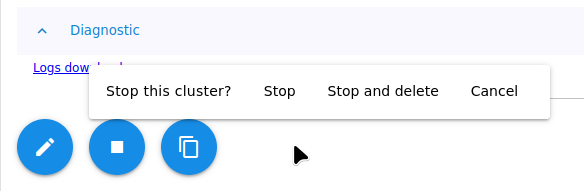
Stopping
When you don’t need the Waterstream cluster you can stop it in the cluster details page (click “Clusters” in the left panel, then click the cluster card): click the “Stop” button, you’ll see the confirmation dialog where you can choose just stop (and keep the cluster configuration for later), stop and delete or cancel. Wait a new minutes until cluster state is “STOPPED”.